Brick homes offer durability and low maintenance, but sometimes homeowners want to update their appearance through painting. Unlike weatherboard painting, brick painting is essentially permanent — removal is extremely difficult and expensive. This guide helps you make an informed decision and, if you proceed, ensures the job is done right.

Should You Paint Brick?
This is the most important question, and it deserves serious consideration before any preparation begins. Once painted, brick requires ongoing maintenance unlike unpainted brick, which can last a century with no coating at all.
Reasons to Paint Brick
Aesthetic transformation: Modernise dated orange or brown brick from the 1960s-80s, create a uniform appearance on homes with mixed cladding materials, achieve a specific colour scheme that natural brick prevents, or cover mismatched brick from extensions and repairs.
Problem solving: Hide efflorescence (white salt deposits) that make brick look neglected, unify patched or replaced bricks that do not match the originals, cover graffiti or deep staining that cleaning cannot shift, or improve the appearance of deteriorating mortar joints.
Resale appeal: Update 1970s-80s brick homes to contemporary painted aesthetics that currently command a premium in some Wellington markets.
Reasons NOT to Paint Brick
Permanence: Brick painting is essentially irreversible. Removal is extremely expensive ($50,000-$100,000+ for a typical home using sandblasting or chemical stripping) and often damages the brick surface beneath. You are committing future owners as well as yourself.
Ongoing maintenance: Painted brick needs repainting every 10-15 years. Unpainted brick lasts 100+ years maintenance-free. Each repaint is a cost that never existed before the first coat went on.
Cost: Initial painting $15,000-$35,000 for a typical Wellington home. Future repaints every 10-15 years. The lifetime cost is substantial compared to leaving natural brick.
Moisture concerns: Paint can trap moisture in brick, causing spalling (surface flaking) and long-term structural damage. Only breathable paint systems mitigate this, and they must be applied correctly. Wellington's high rainfall and coastal humidity make this risk more acute than in drier regions.
Reduced options: Once painted, future aesthetic choices are limited. You cannot return to natural brick without extraordinary cost.
When Painting Makes Sense
Paint brick when the brick is already damaged or visually beyond restoration by cleaning, when aesthetic improvement substantially increases property value, when you are committed to long-term ownership and ongoing maintenance, when the brick is an architectural weakness rather than a feature, and when you fully understand the permanent nature of the decision.
Alternatives to Consider First
Limewash: A traditional breathable coating that weathers naturally over time. Creates a textured European aesthetic. Easier to remove than paint (though still significant work). Requires reapplication every 3-5 years using a DIY wash application. A good middle ground between painting and leaving natural.
Penetrating stain: Changes brick colour while maintaining the natural texture. More natural-looking appearance than paint film. Still difficult to remove but less problematic than a built-up paint layer. Available in a range of earthy tones.
Render/plaster: Cover brick completely with a textured masonry coating. Substantial cost but creates an entirely different aesthetic. Common on Mediterranean-style renovations and can be painted in any colour.
Professional brick cleaning: Cleaning properly can transform the appearance of dirty or stained brick without any coating. Costs $3,000-$8,000 for a typical home, is reversible, and carries no future maintenance obligation. Worth trying before committing to paint.
Brick Painting Preparation
Preparation determines whether paint adheres for 15 years or fails within 3. There are no shortcuts on brick.
Step 1: Moisture Assessment
Brick must be dry and free from moisture problems before painting. Test by taping a plastic sheet to the brick surface and leaving it 48-72 hours. Condensation on the interior of the plastic indicates a moisture problem that must be resolved before painting. Sources include failed gutters directing water to walls, poor drainage at foundation level, rising damp from ground contact, and leaking internal plumbing. Painting over moisture problems guarantees paint failure and potential brick damage.

Step 2: Structural Repairs
Mortar repointing: Remove deteriorated mortar to 15-20mm depth. Clean joints thoroughly. Fill with matching mortar. Tool joints to match the existing profile. Allow 2-4 weeks curing before painting — new mortar is highly alkaline and will attack paint that is applied too early.
Crack repair: Fill hairline cracks with flexible masonry filler. Structural cracks need engineer assessment before any cosmetic work. Do not paint over structural issues.
Efflorescence removal: Brush off white salt deposits. Wash with diluted vinegar solution. Allow to dry completely. If efflorescence reappears, ongoing moisture is present — address the source before painting or the salts will push through the new paint film.
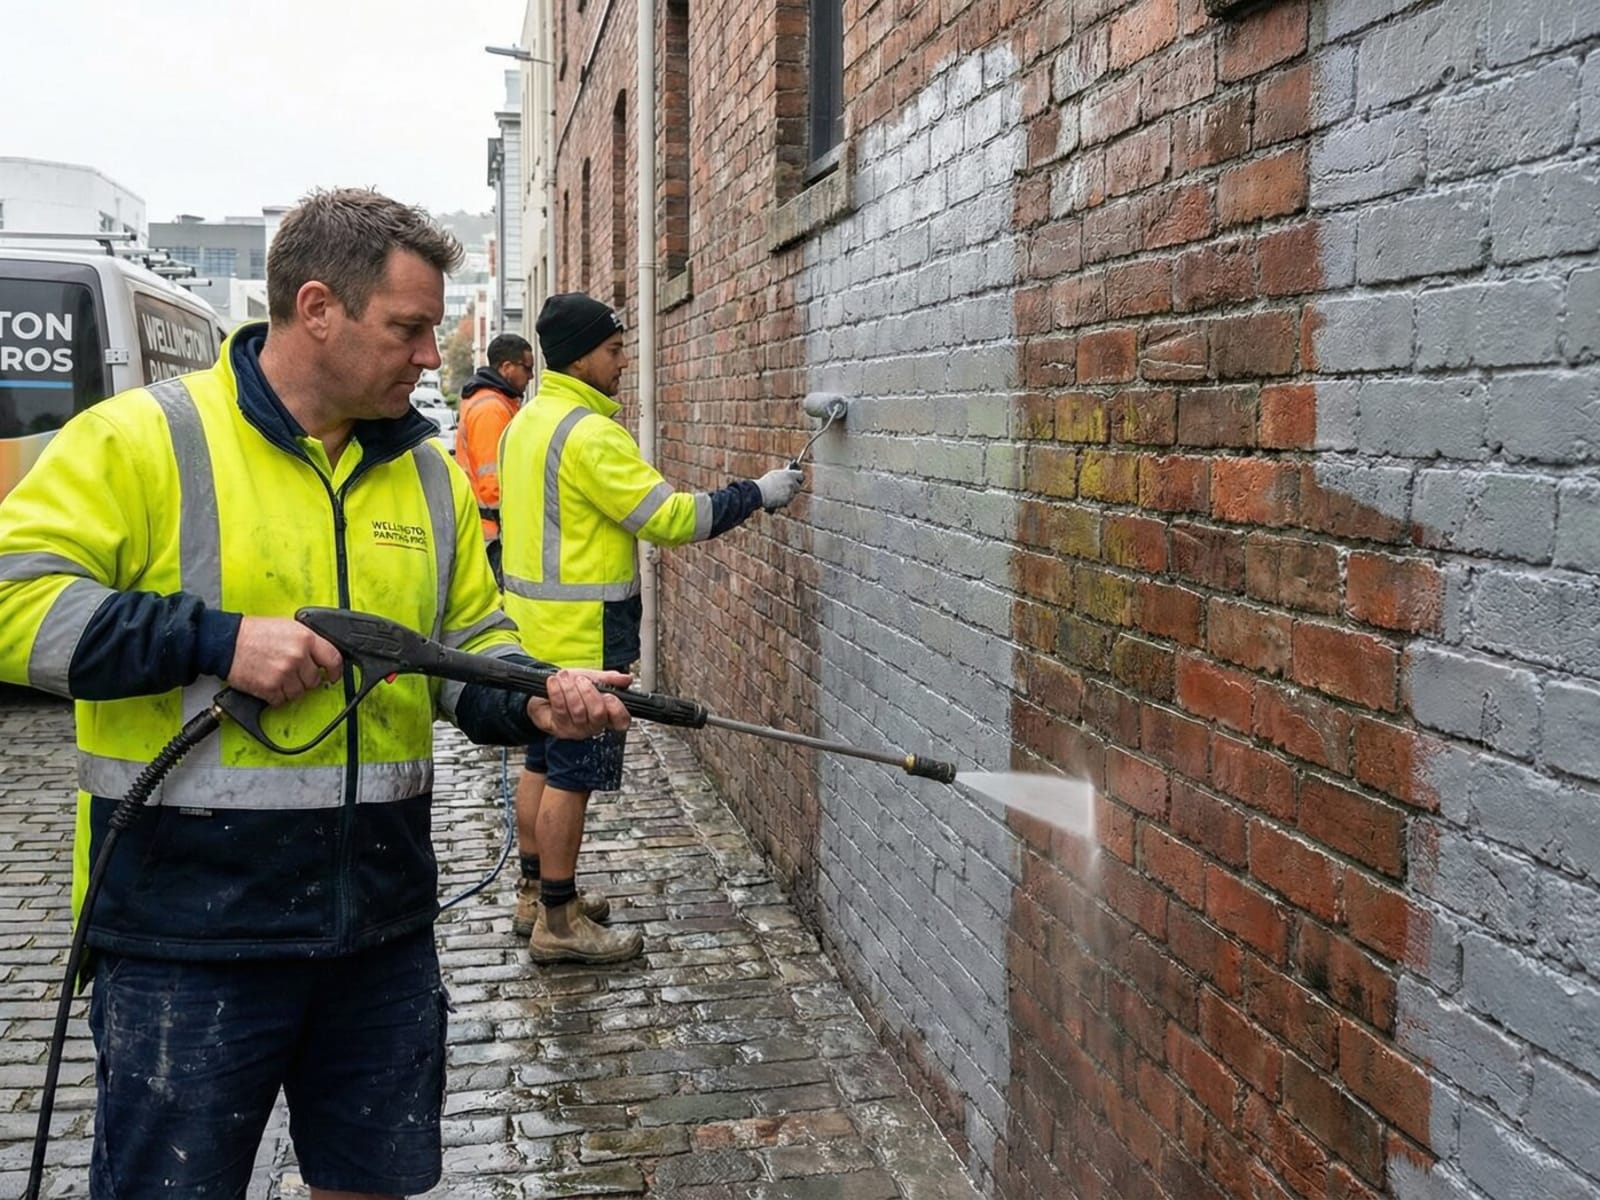
Step 3: Cleaning
Brick must be completely clean for paint adhesion. Remove all dirt, dust, and organic growth using appropriate cleaners for the brick type. Avoid high-pressure washing above 1,500 PSI — it damages mortar joints. Low-pressure water blast at 1,000-1,500 PSI maximum is acceptable. Consider chemical cleaning for stubborn staining. Never use chlorine bleach — it damages mortar and can cause efflorescence.
Step 4: Drying Time
Critical in Wellington's humid climate. Brick and mortar must dry completely — typically 2-3 weeks after cleaning. Allow longer in winter or for south-facing and shaded walls. Professional painters verify dryness with moisture meters. Brick moisture content should be below 8% before priming. Rushing this step is one of the most common causes of premature paint failure on brick.
Step 5: Priming
Proper primer is critical for adhesion and long-term durability. The primer must be breathable (allows moisture vapour transmission through the film), alkali-resistant (brick and new mortar are highly alkaline), capable of sealing porous brick, and compatible with the topcoat system.
Recommended Resene primers: Resene Concrete & Masonry Primer for general purpose breathable priming, Resene Broadwall Surface Prep & Seal for particularly porous brick, and Resene Limelock for maximum alkali resistance on new brick or fresh repointing.
Paint Systems for Brick
Standard weatherboard paints are not suitable for brick. Breathable masonry systems are required — if moisture cannot pass through the paint film, it will build up behind it and cause peeling, spalling, and long-term brick damage.

Recommended Resene Systems
Premium: Resene Sonyx 101 — Advanced breathable acrylic with excellent vapour permeability. Superior durability of 12-15 years. Low-sheen finish suits brick texture. Best long-term performance in Wellington conditions.
Mid-range: Resene Lumbersider — Breathable low-sheen acrylic with good vapour transmission. Reasonable durability of 8-10 years on brick. More economical than Sonyx 101.
Not recommended: Oil-based paints (trap moisture), high-gloss finishes (unnatural on brick texture), budget paints (insufficient breathability for masonry), and waterproofing paints marketed as sealers (cause brick damage by preventing vapour transmission).
Number of Coats
Brick's texture and porosity require more paint than smooth surfaces. Porous older soft brick needs 1-2 coats of primer and 2-3 topcoats. Dense modern brick needs 1 coat primer and 2 topcoats. Skimping on coats leaves a patchy appearance and significantly reduces durability — the texture of brick means there is far more surface area to cover than on a smooth wall.
Application Method
The most effective approach combines spray and brush/roller. Spray the main areas for even coverage efficiency. Back-roll after spraying — running a roller through the wet spray forces paint into brick texture and eliminates voids. Brush mortar joints and intricate details. This combination approach is professional standard and delivers better penetration into brick texture than any single method alone.
Brick Painting Costs Wellington
Brick painting costs more than weatherboard due to higher material consumption and more intensive surface preparation.
| Brick Area | Standard Condition | Problem Brick |
|---|---|---|
| 150-250m² | $12,000-$18,000 | $18,000-$25,000 |
| 250-400m² | $18,000-$28,000 | $25,000-$38,000 |
| 400-600m² | $28,000-$40,000 | $38,000-$55,000 |
Problem brick includes extensive repointing, efflorescence treatment, significant structural repairs, or difficult scaffolding access. Additional cost factors: mortar repointing $3,000-$8,000 | scaffolding for two-storey $2,000-$5,000 | multiple colours $2,000-$5,000 | difficult access $+15-30%.
Colour Selection for Brick
Colour choice is particularly important given the permanent nature of this decision. Test large samples of at least 1m x 1m on the actual brick surface and observe for several days in different light before committing.
Whites and off-whites: Most popular choice for brick transformation. Modern, clean aesthetic. Resene Double Sea Fog, Black White, and Quarter Pearl Lusta are common. Be aware that white shows dirt more readily on a textured surface like brick than it does on smooth walls.
Light greys: Contemporary without stark white contrast. Hides dirt better than pure white. Suits Wellington's aesthetic and light quality. Resene Half Rakaia and Quarter Stonehenge are proven performers.
Warm neutrals: Softer than white, complement brick texture, timeless appeal. Resene Half Spanish White and Quarter Biscotti work well.
Dark colours: Dramatic transformation but requires 3+ coats and absorbs significant heat on sunny walls. Higher heat absorption may stress brick over time. Resene Ironsand and Baltic Sea should be used cautiously on brick, particularly on north-facing walls with direct sun exposure.
Avoid: Bright or intense colours (age poorly and limit future options), multiple colours applied to the same brick area (looks busy against brick texture), and colours too similar to the original brick (the transformation is too subtle to justify the cost and commitment).
Painted Brick Maintenance
Annual inspection: Check for paint cracking or peeling (particularly around windows and at the base), efflorescence pushing through the paint film, mortar joint deterioration, and mould growth in sheltered areas such as eaves and recesses.
Cleaning every 1-2 years: Low-pressure wash at 1,000-1,500 PSI maximum with gentle detergent for stubborn dirt. Treat mould with oxygen bleach before washing. Never use high-pressure washing — it progressively damages mortar joints.
Repainting timeline: Normal conditions 10-15 years with premium Resene systems. Faster repainting needed for coastal exposure (8-10 years), south-facing walls (8-12 years), poor initial preparation (5-8 years), or budget paint systems (5-7 years).
Common Brick Painting Problems
Paint peeling: Usually caused by moisture trapped behind the paint, inadequate surface preparation, painting over damp brick, or using a non-breathable paint type. Solution: identify and fix the moisture source, remove failed paint, and repaint with a proper breathable system.
Efflorescence through paint: Salts migrating from brick through the paint film. Solution: remove paint, treat efflorescence, address the moisture source driving salt migration, use alkali-resistant primer, and repaint.
Uneven colour: Caused by insufficient coats, poor application technique, or varying brick porosity across the wall. Solution: apply additional coats focusing on patchier areas to achieve uniform coverage.
Frequently Asked Questions
Can painted brick be returned to natural brick?
Not easily or cheaply. Paint removal from brick typically costs $50,000-$100,000+ for a typical home using sandblasting or chemical stripping, and often damages the brick surface beneath. Consider this decision permanent.
How long does brick painting take?
A typical Wellington brick home takes 2-4 weeks including preparation, drying time between coats, and repointing where needed. Preparation and drying represent the majority of the timeline — the actual painting is faster than the waiting.
Will painting affect my home's value?
It depends on the market and quality of execution. Currently, well-painted brick homes sell competitively in Wellington. However, taste shifts, and future buyers may prefer natural brick. It is not a guaranteed value-add the way fresh external paint on weatherboard typically is.
Do Wellington councils require consent for brick painting?
Generally no consent is needed for painting an existing exterior. However, if your property is heritage-listed or in a character zone, check with Wellington City Council before proceeding — some heritage overlays restrict exterior colour and treatment changes.
Ready to Get Started?
Painting brick transforms appearance but requires informed decision-making and proper execution. Understanding the permanent nature and ongoing commitment helps avoid regret. Wellington Decorators brings masonry painting expertise with proper breathable systems and thorough preparation. As Registered Master Painters using premium Resene products, we ensure painted brick performs in Wellington's climate for the full expected lifespan.
Contact us for brick painting assessment and quote | Exterior house painting services
Wellington Decorators Limited — Registered Master Painters | Resene Eco Decorator
Exterior House Painting | Contact Us
Exterior Painting Services by Suburb
Looking for professional exterior painters in your Wellington suburb? Island Bay exterior painting, Brooklyn exterior painting, Wadestown exterior painting, Johnsonville exterior painting. Get a free quote for your project.
Related Articles


Need Help With Your Painting Project?
Wellington Decorators has been transforming homes across the Wellington region since 2023, led by a founder with 18+ years in the trade. As Registered Master Painters, we back every job with a 5-year workmanship guarantee.
Prefer to talk? Call us now 027 458 6465