There are two common ways to finish walls and ceilings: GIB stopping and plastering. Both leave a smooth surface ready to paint, but they use different materials, methods, and end up with different results. Knowing the difference helps homeowners, builders, and DIYers pick the right method for the job. This article covers what each one involves: the materials, the steps, the tools, and the finish. We also look at how they compare on time, cost, skill, maintenance, and when to use each.
Table of Contents
ToggleKey characteristics of gib stopping
GIB stopping is the finishing process used on plasterboard, often called GIB® board here in New Zealand. It uses specific compounds to hide the joints and seams between sheets of plasterboard. The aim is a smooth, even surface ready for paint or wallpaper. Below are the main features of GIB stopping and how it differs from plastering.
Materials used in gib stopping
The materials matter to the finish you end up with. GIB stopping materials are made to work with plasterboard, set quickly, and grip well. Here is a rundown:
- Joint Compounds: These are the main materials in GIB stopping. They come pre-mixed or as a powder you add water to. The compounds are made of gypsum dust and binders so they spread smoothly and set fast. Once dry, you can sand them back to a clean finish.
- Tape: Reinforcing tape sits in the joint compound so the joints do not crack later. Paper tape is strong and used on flat joints. Fibreglass mesh tape bends more easily and is simpler to handle.
- Beads: Metal or plastic corner beads go on external corners to protect them and keep the edges sharp and straight. The beads get covered with joint compound so they blend into the wall or ceiling.
- Backing Compound: For deeper joints or gaps, a backing compound can go on first. This keeps the surface level and even.
Each material does a specific job in making the finished wall both good-looking and hard-wearing. For example:
- Joint compound fills and smooths the joints.
- Tape reinforces the joint and stops future cracks.
- Beads protect corners and edges.
These materials are straightforward to use and give a clean finish, which is why GIB stopping is popular with builders and DIYers.
Application process of gib stopping
GIB stopping follows a set order of steps that build up to a professional finish. Here is how it works on a real job.
- Preparation: Start by making sure the plasterboard is clean and free of dust and debris. Sort out any screw holes or minor damage first.
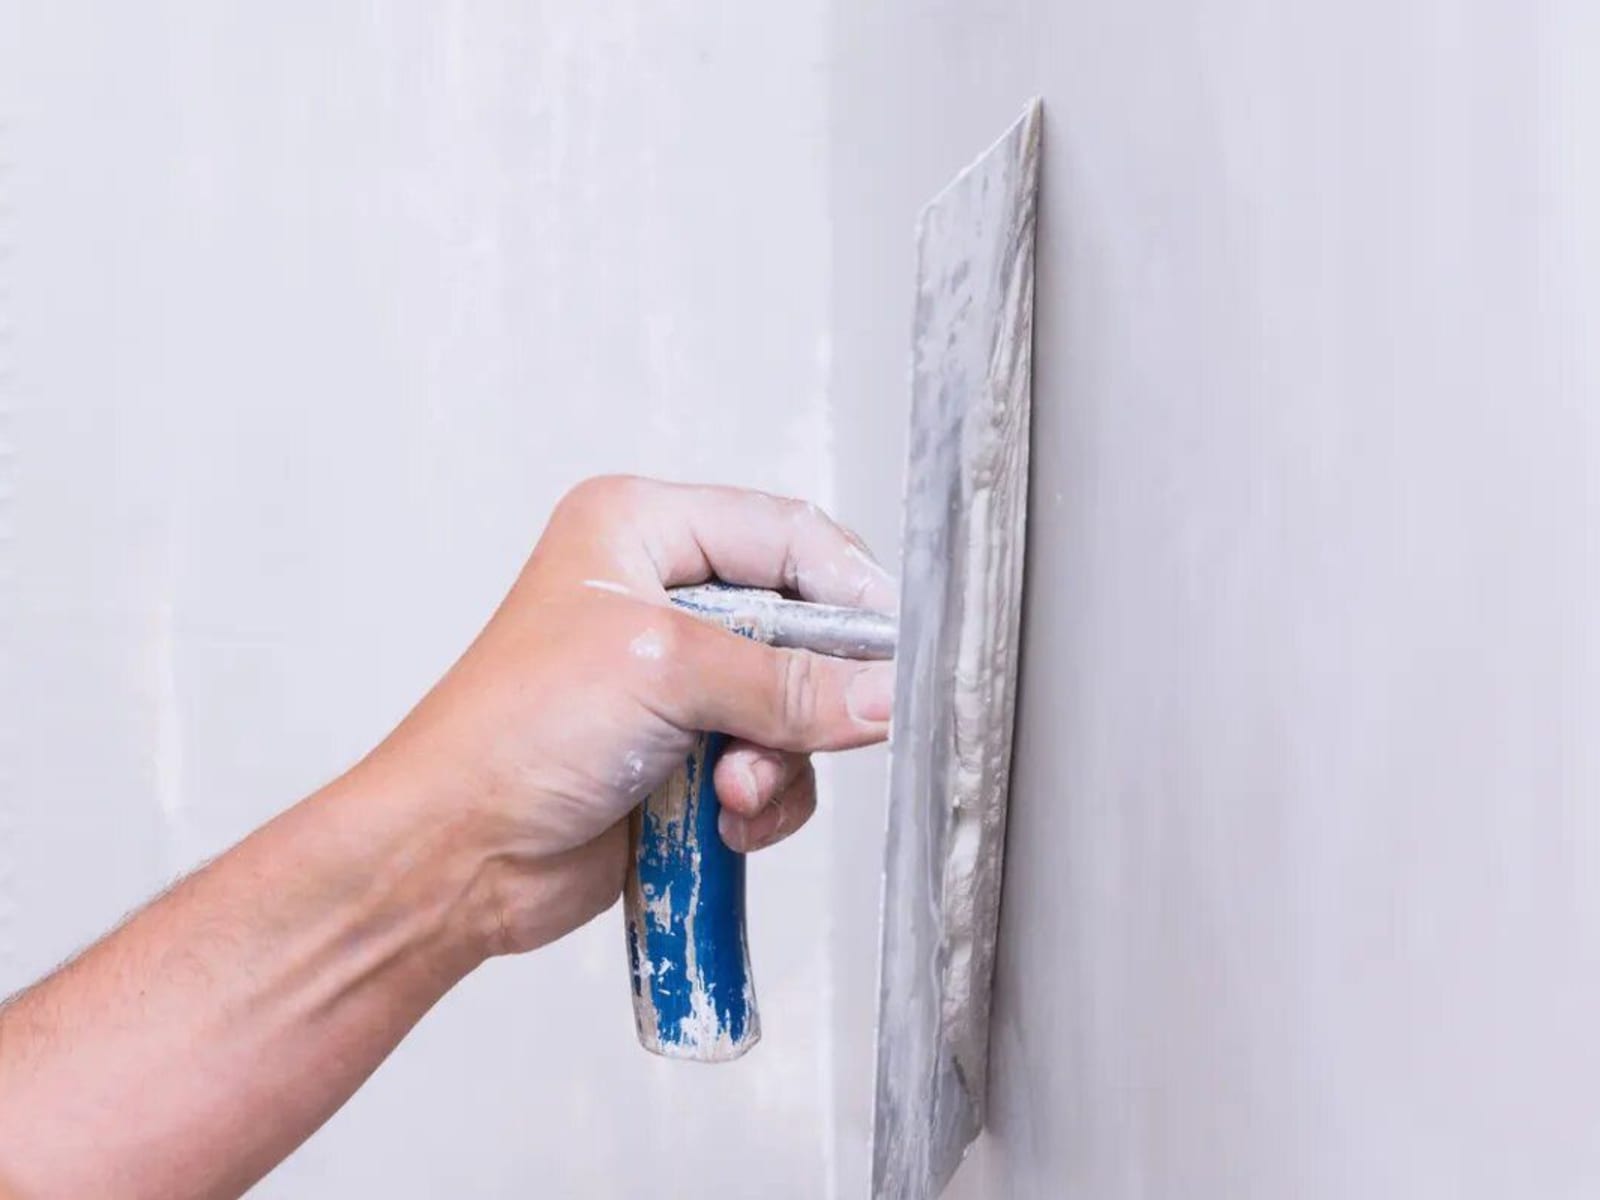
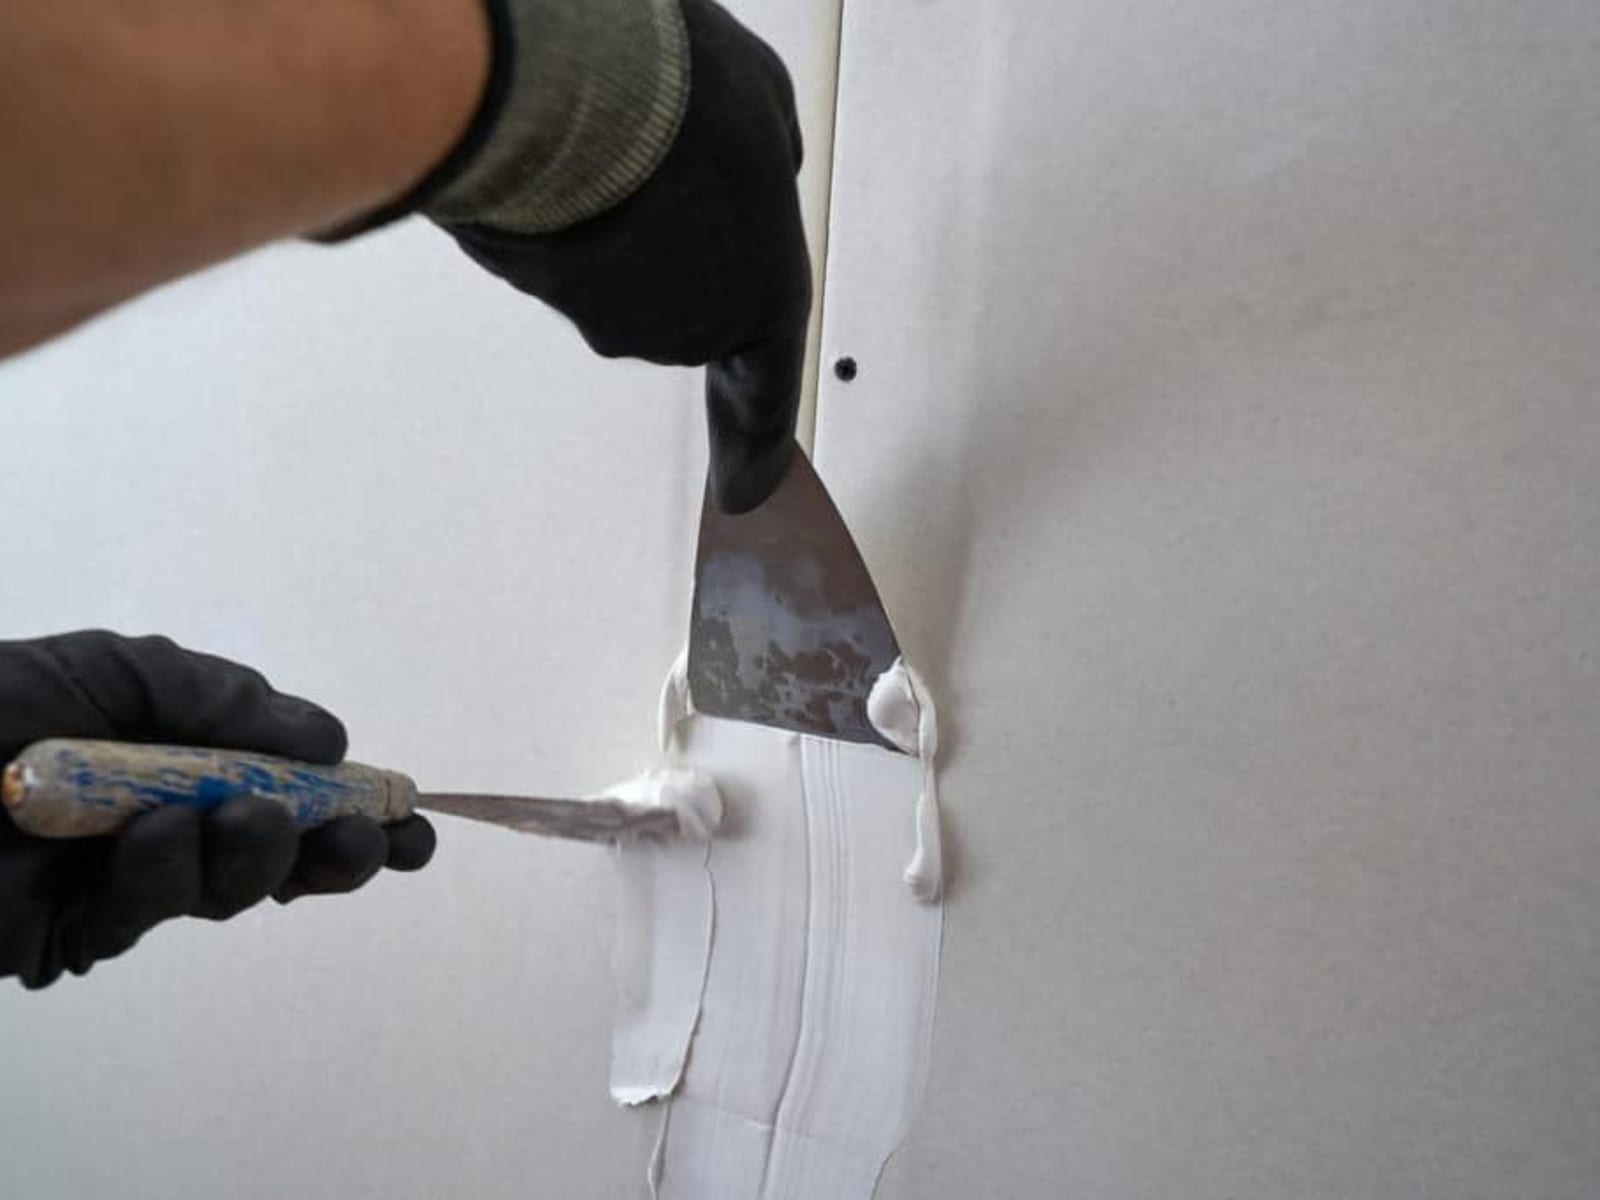
- First Coating: Apply a base layer of joint compound over the seams and joints with a taping knife. Fill the gaps evenly and leave no bumps or ridges.
- Taping: Straight after the first coat, press reinforcing tape (paper or fibreglass) into the wet compound. This step stops the joints cracking down the track.
- Second Coating: Once the first coat and tape have dried, apply a second layer of joint compound. Use a wider taping knife to feather out the edges so the joint disappears.
- Sanding: After the second coat dries, sand back any rough spots or ridges. Fine-grit sandpaper gets the surface flat.
- Final Coating: A third coat of joint compound goes on for a smooth finish, then a careful sand once it dries leaves the surface ready for paint or wallpaper.
- Corner Beads: Fit corner beads on external corners and cover them with joint compound so they line up with the flat surfaces.
The care and accuracy this takes is what gives GIB stopping its quality finish. Next to plastering, GIB stopping is more streamlined, with fewer layers and faster drying times.
Tools required for gib stopping
You cannot run a GIB stopping job without the right tools. Here is what you need:
- Utility Knife: For cutting plasterboard to size and trimming the tape.
- Taping Knives: A range of sizes, from 4 inches to 12 inches, for applying joint compound.
- Hawk: A flat metal plate to hold the compound while you work.
- Sanding Block or Sponge: For smoothing surfaces between coats.
- Mud Pans: Rectangular pans that hold small amounts of joint compound ready to use.
- Corner Trowel: For applying compound neatly on internal and external corners.
Each tool has its own job, and together they let you apply and finish the compound with control. For instance:
- Taping Knives come in different widths for different stages and areas of the job.
- The Hawk holds the compound and keeps it close to hand while you work.
- The Corner Trowel keeps corners neat and tidy on the finished wall.
Finish and durability of gib stopped walls
How well GIB stopping works comes down to the application, the long-term durability, and the quality of the finish.
- Finish: A well-stopped wall is very smooth and gives a flat base for paint or wallpaper. The joints disappear and there are no visible imperfections, which suits a modern, plain look.
- Durability: The compound is strong, but the finish lasts only as well as it was applied. Tape reinforcement and careful sanding between coats cut the risk of cracks or dents over time. Because it is compound-based, though, GIB stopping does not stand up to heavy knocks as well as solid plaster.
Product guides and manufacturer recommendations both point to good prep and the right materials as the keys to a quality finish. GIB® and similar products are widely used to get a reliable result.
GIB stopping is a solid way to get very smooth surfaces with good durability. It shows how the right materials and a well-worked method come together to give the result you want.
Overview of plastering techniques
Plastering has been part of building for centuries, moving from old lime mixes to the cement and gypsum plasters used today. It does more than coat a surface; it gives architects, builders, and homeowners a flexible way to add both strength and a good finish. To compare plastering with GIB stopping, it helps to know the types of plaster and the steps each one takes to reach a professional finish.
Types of plaster used in plastering
Plastering uses a range of materials, each picked for a particular job and finish:
- Lime Plaster: Used since ancient times, lime plaster breathes and flexes, which suits older buildings where moisture has to move. It is made of lime, sand, and water, and people like it for its low impact and long life.
- Cement Plaster: A mix of cement, sand, and water, cement plaster is valued for its strength. It is used on exteriors or areas exposed to moisture, giving a hard, tough surface.
- Gypsum Plaster: Known for setting quickly, gypsum plaster is used on interior surfaces. It gives a smooth finish for paint or wallpaper and is also used for decorative mouldings and cornices.
- Clay Plaster: A low-impact option, clay plaster mixes clay, sand, and natural fibres for a finish that handles humidity and insulates well. It is showing up more in sustainable builds.
- Acrylic Plaster: Made with acrylic resins, this plaster allows decorative finishes and flexes and grips well. It is often used for creative work inside and out because it stands up to the weather.

The traits of each plaster type point to where they are used:
- Lime Plaster breathes, which suits period renovations.
- Cement Plaster is tough, which suits external walls.
- Gypsum Plaster finishes smooth, which suits modern interiors.
- Clay Plaster is low-impact, which suits eco-friendly builds.
- Acrylic Plaster flexes, which allows decorative finishes.
These materials show how varied plastering can be, which is why it works in both old and new settings.
Steps involved in the plastering process
Plastering has several stages and takes careful prep and a steady hand:
- Surface Preparation: Clean the surface and remove dust, dirt, and any loose material. Repair holes or larger flaws so the plaster has an even surface to grip.
- Mixing Plaster: Depending on the plaster, mix it to the manufacturer’s directions to get the right consistency. For gypsum plaster, aim for a smooth, lump-free paste.
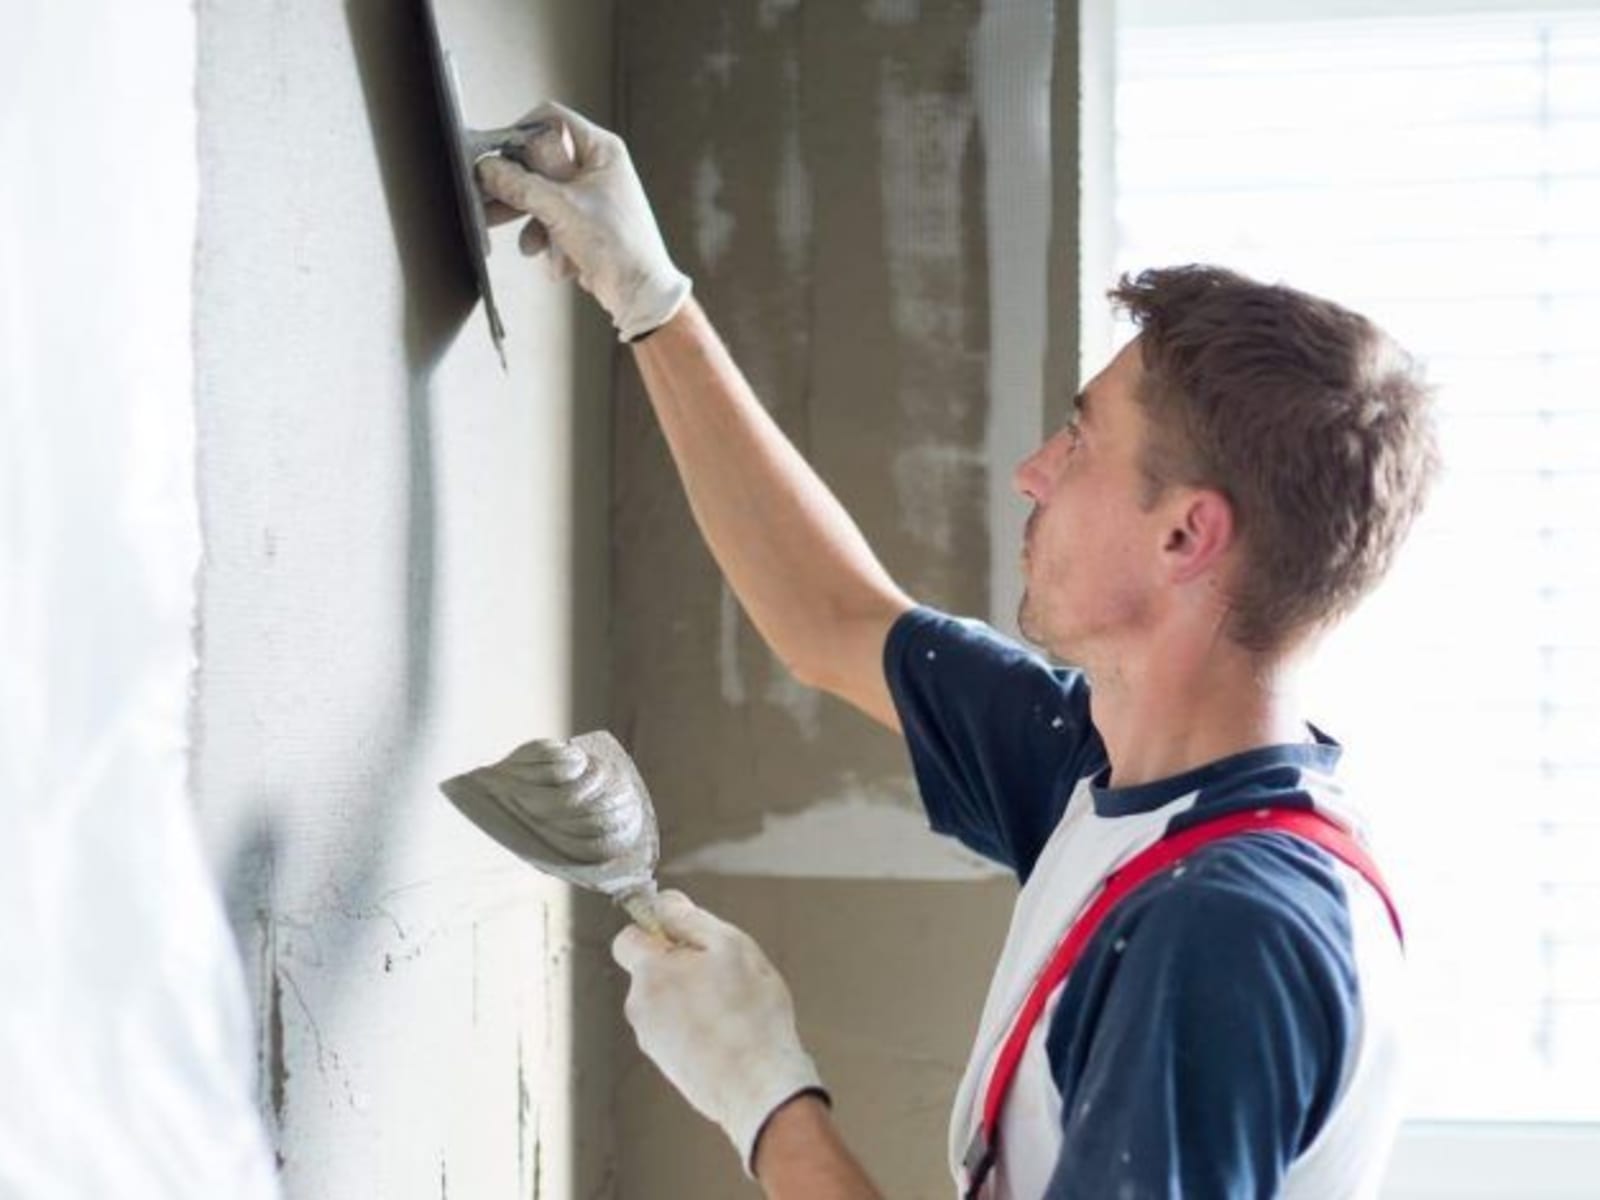
- Applying the Base Coat: Trowel on the base coat. This layer is thicker and supports the finish coat. It covers the irregularities and grips the prepared surface.
- Setting Time: Give the base coat time to set. How long depends on the plaster type and the conditions.
- Sanding: Smooth rough spots on the base coat with fine-grit sandpaper or a float so the surface is ready for the finish coat.
- Applying the Finish Coat: Lay a thinner layer of plaster over the base coat. Smooth it out with a trowel to remove any visible flaws. This coat sets the final look of the wall.
- Finishing Touches: Once the finish coat dries, sand again if needed for a flat surface. Polishing and protective coatings can go on if the job calls for them.
- Curing and Drying: Proper curing matters for how long the plaster lasts. Let it cure in a well-ventilated space and avoid drying it too fast, which can cause cracks.
Each step builds on the last. Prep sets the surface, base coats add body, and finish coats smooth and tidy it up. Plastering takes skill and patience to get a top result.
Tools and equipment for plastering
As with GIB stopping, the right tools matter for plastering. Here is the list:
- Hawk: A portable surface for holding plaster, so it is easy to load onto the trowel.
- Trowel: The main tool for applying and smoothing plaster. Trowels come in a few types:
- Finishing Trowel: For smoothing the final coat.
- Corner Trowel: For getting into the corners.
- Plastering Trowel: Larger, for applying the bulk of the plaster.
- Plastering Float: For evening out the plaster and removing minor flaws before it sets.
- Mixing Bucket: For mixing plaster. Keep it clean so the mix stays free of lumps and contamination.
- Plastering Darby: For levelling large areas of plaster, handy on walls and ceilings.
- Plastering Sponge: For smoothing the surface as the plaster starts to set and harden.
- Scraper and Jointing Knife: For smoothing seams and keeping the surface flat.
- Paddle Mixer: For mixing plaster to the right consistency quickly.
These tools matter for the textures and finishes you want in plaster work. Each has a specific role and all of them feed into how even and clean the finished surface looks.

Textures and finishes achieved through plastering
One of the best things about plastering is the range of textures and finishes it can produce:
- Smooth Finish: A trowel and float give a smooth, even surface for painted walls and ceilings.
- Textured Finish: Methods like slap brush, knockdown, and stippling create patterns and texture on plastered surfaces. Each uses different tools and gives a different look.
- Stucco: Used for decoration and protection on exteriors, stucco layers plaster to get a textured, hard-wearing finish.
- Venetian Plaster: A method using several thin layers of plaster, each polished to a smooth, marble-like finish. It takes real skill and care but gives a rich result.
- Pebbledash: An exterior finish where small pebbles are thrown and pressed into wet plaster for a rugged, textured surface.
The finishes you can get with plastering are wide-ranging, with plenty of options depending on the look you want. From rustic textures to flat modern finishes, plastering gives room to be creative.
Comparison of gib stopping and plastering
GIB stopping and plastering are related but do different jobs and use different methods. Here is how they compare on the points that matter.
Time and cost implications of each method
Time Considerations:
- GIB Stopping: Usually faster, since it deals only with the seams and joints of plasterboard. Quick-drying compounds and fewer layers mean less time overall.
- Plastering: Takes longer, with multiple coats that each need time to dry. That stretches out the timeline but often gives a more durable finish.
Cost Implications:
- GIB Stopping: Generally cheaper, with lower material costs and quicker labour.
- Plastering: Tends to cost more, with more material and skilled labour for the layers and detail.
Skill level required for gib stopping vs. plastering
Skill Level for GIB Stopping:
- Intermediate to Advanced DIY: Homeowners with some experience can take on GIB stopping, but a flawless finish is hard to get. A professional gives a better result.
Skill Level for Plastering:
- Professional Level: Mixing, applying, and finishing plaster takes a higher skill level. Proper training and experience matter for the result.
Long-term maintenance of gib stopped and plastered walls
GIB Stopped Walls:
- Maintenance: Prone to dents and small knocks over time, mostly in high-traffic areas. Needs the odd touch-up or minor repair to stay looking good.
Plastered Walls:
- Maintenance: Usually more durable and better at handling knocks and wear. May need re-coating or touch-ups in high-wear spots, but less often than GIB stopped walls.
Choosing between gib stopping and plastering
Look at the current state of the surface, the finish you want, your budget, your timeframe, and how durable it needs to be. Those factors help homeowners and contractors decide which method to use.
Factors influencing the decision between the two techniques
- Condition of Surfaces: The state of the surface and its materials can decide whether GIB stopping (for new plasterboard) or plastering (for other substrates) fits better.
- Desired Finish: Whether you want a smooth, modern look or a textured one will weigh heavily on the choice.
- Budget: A tight budget often points to GIB stopping for its quicker, cheaper process.
- Time Frame: Jobs with tight deadlines tend to favour the faster GIB stopping method.
- Skill Availability: Whether skilled labour is on hand can also decide which method is practical.
Recommended scenarios for using gib stopping
GIB stopping suits new builds or renovations that use plasterboard, jobs that tidy up the look with little material, and areas that need a quick, cost-effective fix.
Ideal situations for opting for plastering
Plastering works best on jobs that need wall texture, structural reinforcement, smoothing over non-GIB surfaces, and custom decorative finishes.
Conclusion
Choosing between GIB stopping and plastering comes down to knowing what each one does and where it fits. Based on budget, time, skill, or the finish you want, each method has its place. Once you understand both, homeowners, contractors, and DIYers can make a sound call and get a good result on the job.

Khai Do started in the painting and decorating trade at 17 in 2008 and has run Wellington Decorators Limited ever since. He cares about doing the job right and keeping customers happy, and that has shaped how the company works.
Local Gib Stopping Services
Need gib stopping in your area? We do gib stopping across Wellington suburbs including Island Bay, Brooklyn, Wadestown, Johnsonville. Get a free quote for your project today.
Related Articles


Need Help With Your Painting Project?
Wellington Decorators has been transforming homes across the Wellington region since 2023, led by a founder with 18+ years in the trade. As Registered Master Painters, we back every job with a 5-year workmanship guarantee.
Prefer to talk? Call us now 027 458 6465