Table of Contents
ToggleI. Introduction
A. What is Gib Stopping?
Gib stopping, also called plasterboard finishing, is the job of filling and smoothing the joints, corners, and screw holes of Gib® plasterboard walls so the surface is flat and ready for paint or wallpaper. You apply a few coats of plaster and sand between them until the joints disappear into the rest of the wall.
B. Why Should You Fix Your Gib® Plasterboard Walls?
A few good reasons to stop your Gib® plasterboard walls properly:
- Looks: Walls that are stopped well are flat with no visible joints, so paint goes on evenly and the room looks finished rather than patchy.
- Durability: Good stopping protects the joints from cracking and chipping, so the wall holds up longer before it needs work again.
- Value: Tidy, well-kept walls help when you sell or rent. Buyers notice rough joints and bad patches straight away.
- Cost: Learning to stop your own walls lets you handle small repairs yourself and save on hiring someone for every minor job.
This guide covers what you need to know to take on your own gib stopping, from prepping the walls to sanding the last coat flat.
II. Tools and Materials Required for Gib Stopping
Before you start, gather your tools and materials so you are not stopping mid-job to find something. Here is what you need.

A. Essential Tools for Gib Fixing and Stopping
- Trowel: A plastering trowel for spreading and smoothing plaster over the joints.
- Sandpaper: A few grit sizes to knock back the plaster between coats and finish the surface smooth.
- Scraper: A scraper takes off excess plaster and helps level the surface as you go.
- Bucket: A clean bucket for mixing plaster and keeping your gear together.
- Measuring tape: For cutting Gib® sheets to size so you waste less board.
- Utility knife: A sharp knife for scoring and cutting plasterboard cleanly.
- Mudding knife: Also called a joint knife. Use it to apply and smooth joint compound.
- Sanding block: A block keeps the sandpaper flat so you sand evenly and don't dig in.
B. Materials Needed for Plastering Gib® Boards
Along with the tools, you will need these materials for the job:
- Gib® plasterboard: Pick the right thickness and sheet size for your walls so the boards sit flush.
- Plaster: A quality stopping plaster such as Gib® Plus 4 for a smooth, hard-wearing finish.
- Joint compound: For filling gaps, cracks, and screw holes before you plaster over them.
- Gypsum: Gypsum is the main ingredient in plaster and joint compound. It gives the set plaster its strength.
- Corner beads: Beads reinforce and protect the external corners so they hold up to knocks.
- Screws: Use plasterboard screws to fix the Gib® sheets to the wall framing.
- Adhesive: An all-purpose construction adhesive helps bond the sheets to the framing.
III. Preparing Your Gib® Plasterboard Walls for Stopping
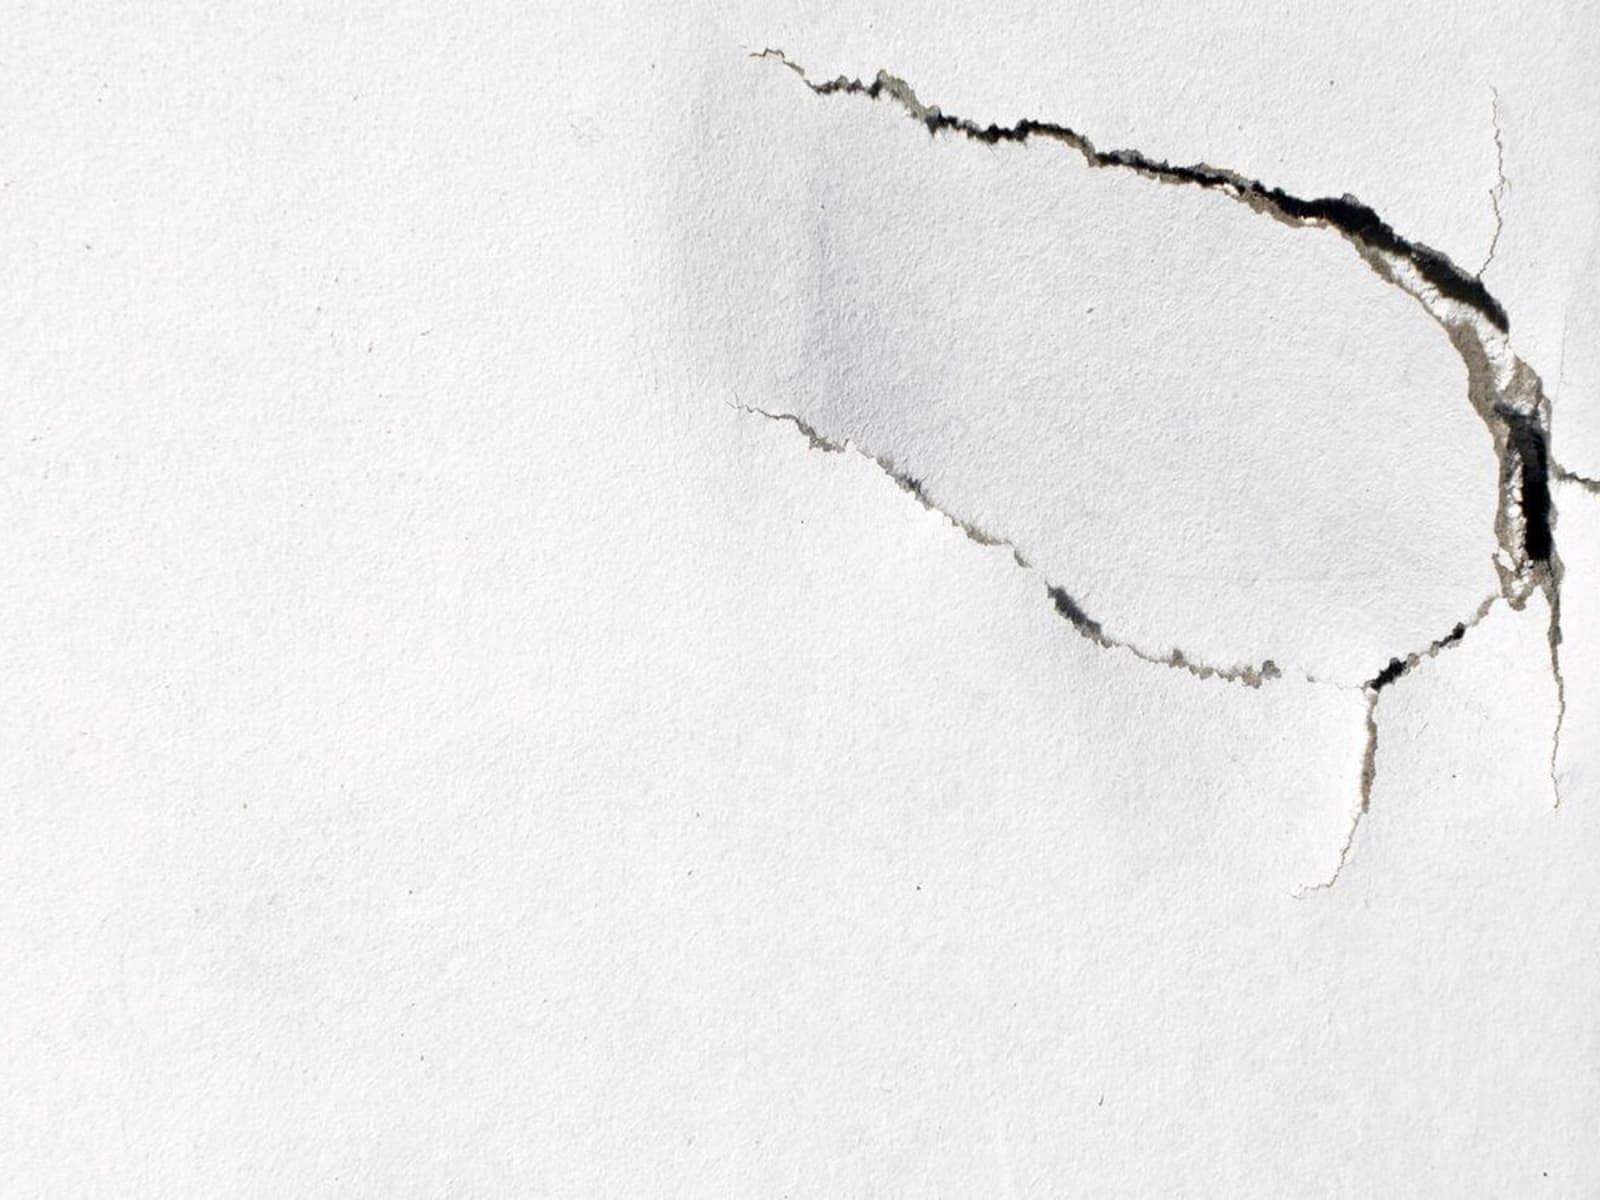
A. Inspecting Your Gib Board for Damage
Before you start gib stopping, go over the walls for damage such as cracks, holes, or water stains. Check each wall and mark the spots that need repair. Doing this first means you know what materials you need before you open a bucket of plaster.
B. Cleaning and Sanding the Surface
Once you have marked the damaged areas, clean the wall to get rid of dust, dirt, and debris. Wipe it down with a damp cloth or sponge and let it dry. If there are rough or uneven spots, sand them lightly with fine-grit sandpaper so the plaster has a smooth base to grip.
IV. How to Gib Stop: Fixing Cracks and Holes in Gib® Plasterboards
A. How to Fix Small Cracks in Gib Boards
Small cracks in Gib® plasterboard are an easy fix with joint compound. Here are the steps:
- Widen the crack slightly with a utility knife to make a V-shaped groove. The compound grips better in the groove and holds longer.
- Apply a thin layer of joint compound over the crack with a mudding knife, filling the groove and smoothing it level.
- Smooth the compound with your knife and feather the edges so they blend into the wall around the crack.
- Let it dry fully, then sand the area with fine-grit sandpaper until it is smooth and flat.
Read more: How to Achieve Smooth Plaster Walls with GIB® Stopping and Lining
B. Repairing Larger Holes in Gib® Plasterboard
For bigger holes, patch the area with a new piece of board before you plaster over it:
- Cut a piece of Gib® plasterboard slightly larger than the hole.
- Trace the outline of the patch onto the wall, then cut along the lines with a utility knife so the patch drops in cleanly.
- Run construction adhesive around the edges of the hole and press the patch firmly into place.
- Fix the patch with plasterboard screws, sitting them just below the surface so the heads don't show through the compound.
- Cover the patch and screw holes with joint compound, smoothing it level with a mudding knife.
- Let it dry, then sand the area until it sits flush with the wall around it.
V. Applying Plaster to Gib® Boards
A. Mixing the Plaster for Your Gib Stopping Project
Getting the plaster to the right consistency matters. Follow the manufacturer's instructions and stick to the water-to-plaster ratio they give. Mix it in a clean bucket with a paddle mixer or a drill with a mixing attachment until it is smooth and lump-free. You want it to spread evenly without dragging or running off the trowel.
B. Techniques for Plastering Gib® Plasterboard Walls

When you plaster your Gib® plasterboard walls, work like this:
- Start with a clean, damp trowel and lay a thin, even coat over the wall in steady strokes.
- Work in small sections, starting at the top of the wall and moving down.
- Hold the trowel at a slight angle and use long strokes to spread the plaster flat.
- Feather the edges of each section into the next so you don't leave ridges or visible seams.
- Let the first coat dry fully before you put on a second coat if you need one.
- Keep going until the surface is flat and even with no high or low spots.
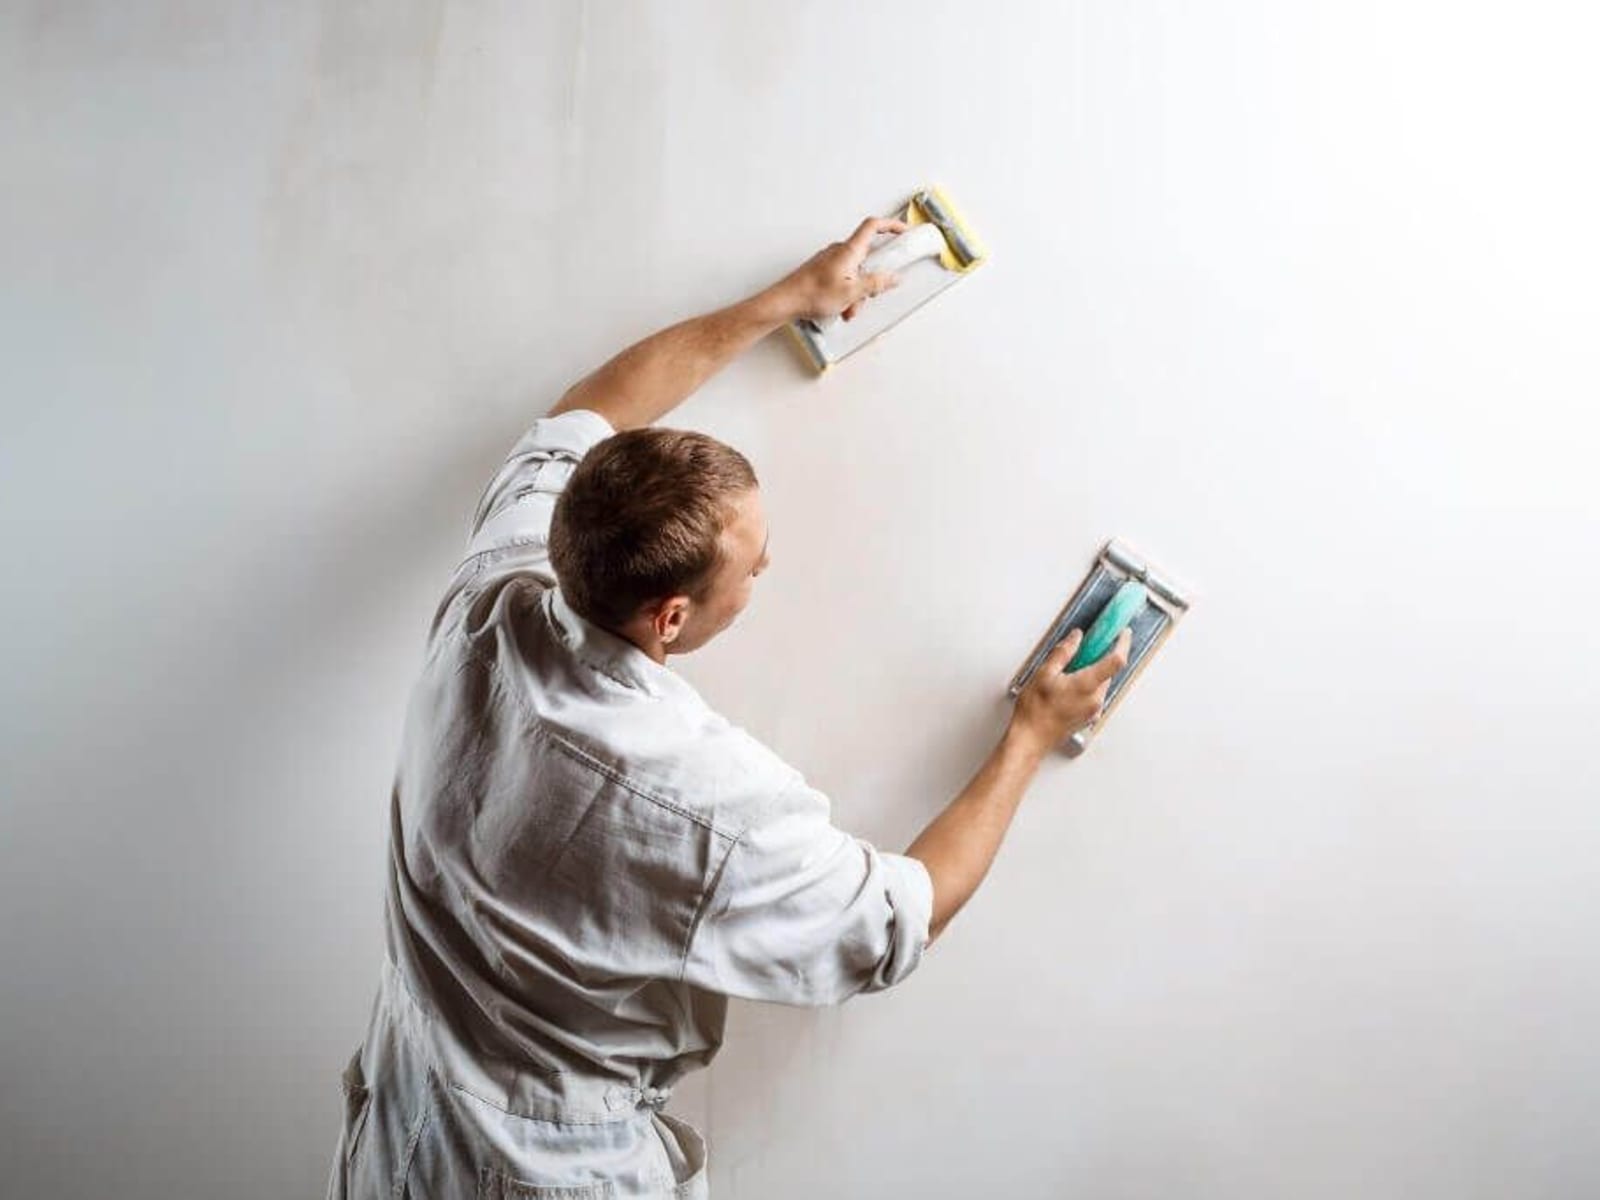
VI. Skimming Plaster on Gib® Plasterboard Walls
A. Preparing the Surface for Skim Coating
Before the final skim coat, get the walls ready:
- Sand the wall lightly with fine-grit sandpaper to take off any rough spots or ridges.
- Clean the walls with a damp cloth or sponge to clear dust and debris so the skim coat sticks.
- Let the walls dry fully before you skim.
B. Applying the Skim Coat to Your Gib Board
To put on the skim coat:
- Use a clean, damp trowel and lay a thin, even layer over the wall in steady strokes.
- Work in small sections, using long strokes to spread the plaster flat.
- Feather the edges of each section into the next so the joins don't show.
- Let the skim coat dry fully before you sand it.
VII. Finishing Touches for Your Gib Stopping Project
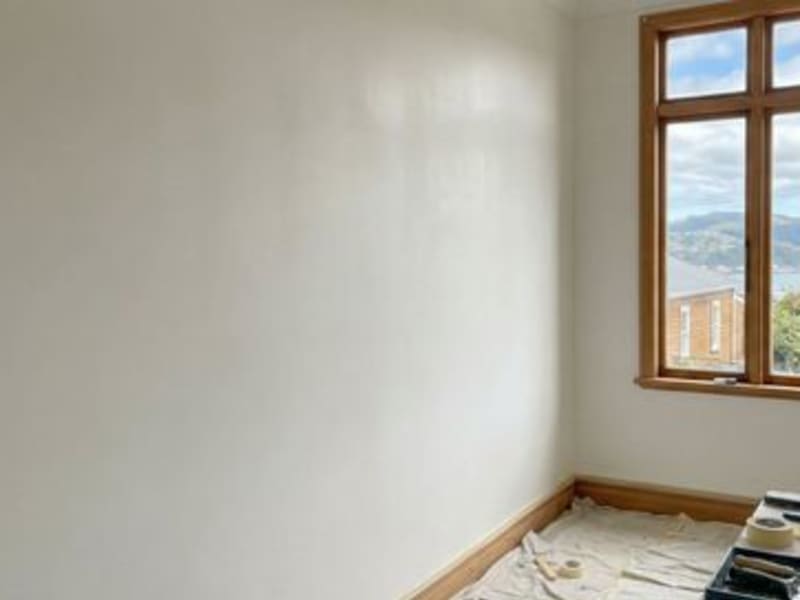
A. Sanding and Smoothing the Plastered Surface
Once the final skim coat is dry, sand the whole wall with fine-grit sandpaper to take out any minor marks and leave it smooth. Clean the walls down afterwards to clear the sanding dust before you paint.
B. Handling Gib® Corner Stops and Trims
Install Gib® corner stops and trims at the external corners and edges of your walls:
- Measure and cut the corner stops or trims to length with a mitre saw or utility knife.
- Run a thin bead of construction adhesive along the back of the stop or trim.
- Press it firmly into place, checking it sits straight and level.
- Wipe off any excess adhesive with a damp sponge and smooth the edges.
- Let the adhesive dry fully before you paint or wallpaper.
VIII. Common Mistakes to Avoid When Gib Stopping
A. Pitfalls to Watch Out for During Gib Fixing
Watch out for these common mistakes when you stop your walls:
- Putting plaster on too thick. Thick coats crack and dry unevenly.
- Not leaving enough drying time between coats. Rushing this leaves you sanding back soft plaster.
- Heavy-handed troweling. Use gentle, even strokes so the surface stays smooth.
- Skipping wall prep. A dirty or uneven surface shows through the finished coat, so clean and level it first.
B. How to Prevent Cracking and Flaking of Plaster
To keep your plaster from cracking and flaking:
- Make sure the wall is clean, dry, and free of debris before you plaster.
- Mix the plaster to the manufacturer's instructions and keep the consistency right.
- Apply thin, even coats and let each one dry before the next.
- Plaster in moderate temperatures and low humidity so it dries evenly and doesn't crack as it sets.
IX. When to Hire a Professional for Gib Stopping
A. Signs That Your Gib® Plasterboard Walls Need Expert Help

Plenty of gib stopping is DIY-friendly, but some jobs are better left to a professional:
- Heavy water damage or structural problems in the walls or ceiling, which need proper repair before stopping.
- Large renovations or new builds, which can be too big or slow to take on yourself.
- Tricky wall layouts that need experience and the right tools to finish cleanly.
- Tight timeframes, or jobs where you'd rather pay someone than risk a result you can't fix.
B. Finding a Reliable Gib Stopping Contractor
If you decide to hire someone for your gib stopping:
- Look for local contractors with real plasterboard finishing experience and a track record you can check.
- Read reviews and ask for references to confirm the quality of their work.
- Get quotes from a few contractors and compare both price and what is included.
- Check the contractor is licensed and insured so you are covered if something goes wrong on the job.
- Talk through the job in detail and agree on what you expect before you sign anything.
X. Conclusion
A. Recap of the Gib Stopping Process
Gib stopping runs through a few steps: prep the wall, fix cracks and holes, apply several coats of plaster, sand back, and fit corner stops and trims. Work through the steps in this guide and you can handle your own gib stopping and get a flat, paint-ready wall.
B. Encouragement for DIY Enthusiasts to Take on Gib Fixing Projects
Gib stopping can look daunting the first time, but it is a satisfying DIY job that lifts how a room looks and adds value to your home. With the right tools, materials, and a bit of practice, you can finish your own walls and be glad you did it yourself.
Take your time, follow the steps, and call in a professional when a job is past what you want to tackle. With some patience you'll get a tidy result and a room you and your family can enjoy for years.
So grab your tools, get your materials together, and have a go. With this guide and a bit of effort, you'll be turning out flat, paint-ready walls before long. Good luck with your gib stopping.
If you want painting and decorating done in Wellington, talk to Wellington Decorators Limited. Founder Khai Do has been on the tools since 2008, and we are members of the Registered Master Painters and a Resene Eco Decorator. We back our work with a 5-Year Workmanship Guarantee.
Email: info@wellingtondecorators.co.nz
Phone: 027 458 6465
Address: 1 Comber Place, Johnsonville, Wellington 6037
Office Hours: Monday to Friday, 8:00 am – 5:00 pm
Click the button below and fill out our contact form. We'll get back to you with a free consultation and quote. We serve Wellington, Lower Hutt, Upper Hutt, Porirua, and the Kapiti Coast.

Khai Do started in the painting and decorating trade at 17 in 2008 and runs Wellington Decorators Limited. His standards for prep and finish set how the company works.
Local Gib Stopping Services
Need gib stopping in your area? We provide gib stopping services across Wellington suburbs including Tawa gib stopping, Miramar gib stopping, Thorndon gib stopping, Newlands gib stopping. Get a free quote for your project today.
Related Articles


Need Help With Your Painting Project?
Wellington Decorators has been transforming homes across the Wellington region since 2023, led by a founder with 18+ years in the trade. As Registered Master Painters, we back every job with a 5-year workmanship guarantee.
Prefer to talk? Call us now 027 458 6465