"Preparation is everything" isn't just a cliché in roof painting — it's the difference between a 15-year paint job and one that fails within 3 years. We've seen countless DIY attempts and budget painter jobs fail early because they rushed or skipped critical prep steps. In Wellington's harsh climate, proper preparation isn't optional. Here's what professional roof prep actually involves.

Why Preparation Matters More Than Paint Quality
The 80/20 rule of roof painting:
- 80% of longevity comes from preparation quality
- 20% from paint product selection
What preparation accomplishes:
- Creates clean surface for paint adhesion
- Removes contaminants (dirt, moss, loose paint) that prevent bonding
- Treats rust to stop continued metal deterioration
- Repairs damage that paint alone can't fix
- Dries substrate to prevent trapped moisture
- Provides tooth for mechanical paint grip
Skipped prep results:
- Paint peeling within 1-2 years
- Continued rust spread beneath paint
- Water trapped causing blistering
- Uneven finish showing all flaws
- Early coating failure
Wellington's Specific Roof Challenges
Wellington's climate creates more demanding conditions for roofs than most New Zealand cities face. Understanding these specific pressures clarifies why preparation cannot be rushed here.
Salt air corrosion: Wellington's coastal position means most roofs receive regular salt deposition from sea air, particularly properties in Miramar, Lyall Bay, Island Bay, Rongotai, Oriental Bay, and other harbour-facing suburbs. Salt accelerates rust formation dramatically — a galvanised iron roof near the coast can develop surface rust 3-4 times faster than an inland property of the same age. Preparation must include thorough salt removal, not just organic growth.
UV and wind cycling: Wellington's UV levels are high year-round, while constant wind cycling creates repeated physical stress on paint films. Coatings expand and contract with temperature changes and flex under wind pressure. Only properly adhered paint survives this without cracking or delaminating. Paint applied over inadequately prepared surfaces has no margin for these physical stresses.
Moss and lichen prevalence: Wellington's consistently moist, shaded conditions produce prolific moss and lichen growth on roofs. These organisms are not merely cosmetic — they retain moisture against the roof surface, accelerating corrosion, and their rhizoids (root-like anchors) physically penetrate paint films and substrate. Removing them superficially without proper biocide treatment almost guarantees rapid regrowth under the new coating.
Drainage complexity: Many Wellington homes are built on steep, irregular sections, creating complex roof geometries with multiple valleys, gutters, and penetrations. These details are both the most vulnerable points for water ingress and the most labour-intensive to prepare properly. Budget painters frequently under-prepare these areas because they take disproportionate time relative to large flat surfaces.
Step 1: Initial Roof Inspection
What professional inspection includes:
Structural assessment:
- Walk entire roof surface
- Test for soft/rusted areas
- Check sheet security
- Identify structural concerns
Rust evaluation:
- Map rust extent
- Determine rust depth (surface vs structural)
- Identify rust causes (poor drainage, failed coating)
- Plan treatment approach
Damage documentation:
- Photograph problem areas
- Note required repairs
- Assess fastener condition
- Check flashing integrity
Moisture detection:
- Internal ceiling inspection for leaks
- Moisture meter readings
- Identify leak sources
- Plan repair sequence
Wellington-specific checks:
- Wind damage to fixings
- Coastal corrosion patterns
- Moss/lichen extent
- Ventilation adequacy
Time investment: 30-60 minutes for thorough inspection
Value: Identifies issues before they're painted over and hidden
Step 2: Pre-Treatment (1-2 Weeks Before)
Moss and lichen treatment:
- Apply biocide solution (wet and forget style products)
- Allow 7-10 days die-off period
- Loosens growth for easier removal
- Reduces regrowth under new paint
Why early treatment matters:
Dead moss removes more completely during water blasting. Live moss is harder to dislodge and may remain partially adhered.
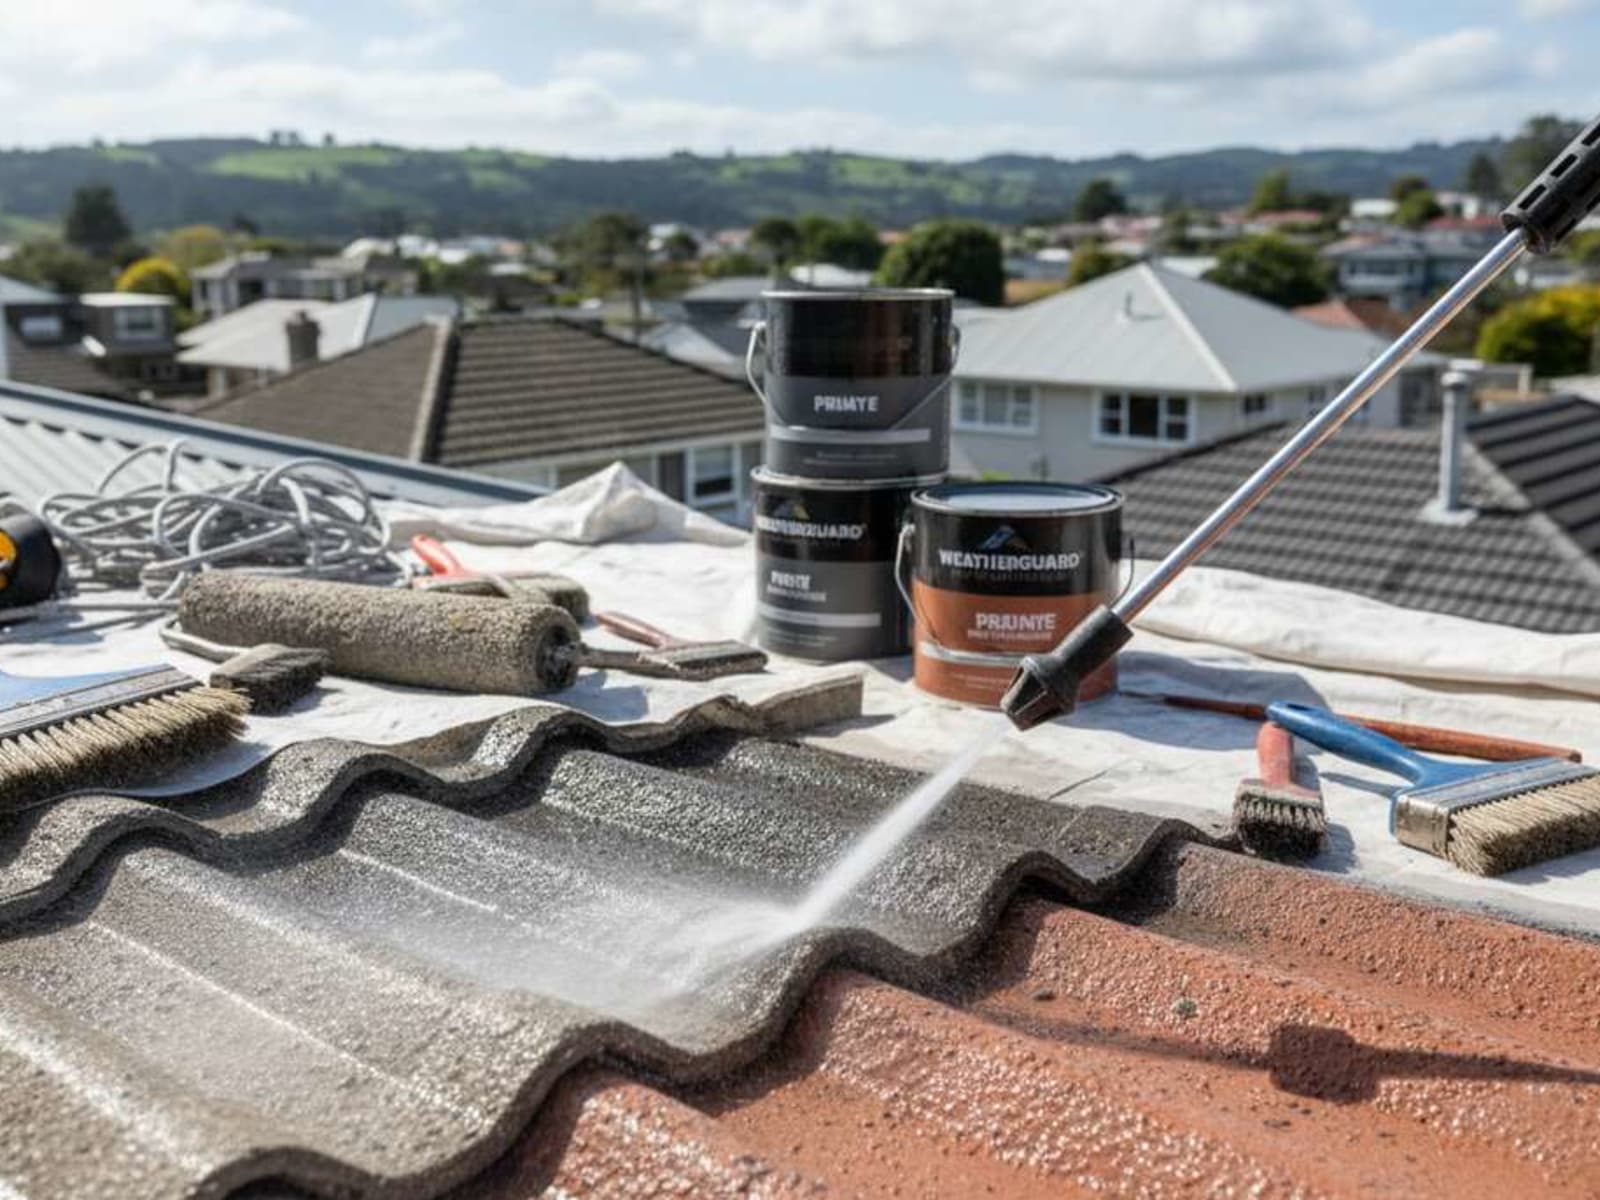
Step 3: High-Pressure Water Blasting
The most critical prep step.
Pressure specifications:
- Metal roofs: 2500-3500 PSI
- Tile roofs: 2000-2500 PSI (lower — tiles more fragile)
- Too low: Doesn't remove contaminants
- Too high: Damages substrate
What water blasting achieves:
- Removes dirt, grime, salt buildup
- Eliminates moss, lichen, algae
- Strips loose and failing paint
- Opens metal surface pores for adhesion
- Clears gutters and valleys
- Reveals underlying issues
Proper technique:
- Top-down approach (prevents water under roofing)
- Consistent pressure and distance
- Overlap passes for complete coverage
- Extra attention to valleys, ridges, penetrations
- Clear debris from gutters during process
Common mistakes:
- Insufficient pressure (doesn't clean properly)
- Too close (damages surface, drives water under flashings)
- Incomplete coverage (missed spots cause adhesion failure)
- Wrong nozzle angle (lifts roofing sheets)
Wellington considerations:
- Plan for windy conditions (spray control)
- Schedule around rainfall
- Extra attention to windward faces (more dirt accumulation)
- Coastal properties need aggressive cleaning (salt removal)
Time required: 4-8 hours for typical Wellington home (180m² roof)
Step 4: Drying Period (Critical)
Minimum drying requirements:
- Metal roofs: 2-3 consecutive dry days
- Tile roofs: 3-4 consecutive dry days (porous surface holds moisture)
- Humidity below 70%
- Temperature above 10°C
- No rain forecast for painting period
Why drying matters:
Paint applied to damp surfaces:
- Doesn't adhere properly
- Traps moisture causing blistering
- Creates rust beneath coating
- Fails within 1-3 years
Professional verification:
- Moisture meter readings
- Visual surface check
- Touch test (should feel completely dry)
- Check underside of tiles/sheets where possible
Wellington challenge:
High humidity and unpredictable weather make drying difficult. This is why Wellington roof painting requires experienced weather forecasting and flexible scheduling.
What happens if it rains during drying:
- Restart drying period
- May need light re-wash if heavy rain
- Delays project 2-3 days minimum
Step 5: Rust Treatment
Surface rust (most common):
Process:
- Wire brush by hand or drill attachment
- Grind back to clean metal
- Apply rust converter/neutraliser (turns rust to stable compound)
- Allow 6-12 hour cure
- Spot prime with rust-inhibiting primer
Products we use:
- Resene Rustmaster
- Dulux Rust-Arrest
- Penetrol (rust stabiliser)
Moderate rust:
Process:
- Angle grind back to bright metal
- Feather edges for smooth transition
- Apply rust primer (full coverage of treated area)
- 24-hour cure before topcoat
Severe structural rust:
- Replace affected panels/sections
- Painting over compromised metal is false economy
- Will fail within 2-3 years and spread
Common rust locations:
- Fastener points (water penetration)
- Valleys (water concentration)
- Lower roof edges (splash-back)
- Flashing junctions
- Cut edges on long-run roofing
Time investment: 2-6 hours depending on extent
Step 6: Repairs
Typical pre-paint repairs:
Fastener issues:
- Tighten loose screws/nails
- Replace rusted fasteners
- Add fixings where sheets have lifted
- Cost: $150-$400
Flashing repairs:
- Reseal gaps with silicone or butyl
- Replace severely rusted flashings
- Ensure proper overlap and seal
- Cost: $200-$800

Sheet repairs:
- Reseal lifted seams
- Replace damaged sections
- Patch small holes (metal/fibreglass)
- Cost: $300-$1,500
Ridge/valley repairs:
- Re-bed loose ridge tiles
- Replace valley iron if rusted through
- Reseal capping
- Cost: $400-$1,200
Why repair before painting:
Paint doesn't fix structural issues. Leaks will continue and worsen beneath new coating.
Step 7: Priming
When primer is essential:
- Bare metal (galvanised, zincalume, replacement sections)
- Heavy rust treatment areas
- Previously unpainted roofs
- Poor existing paint adhesion
When primer is optional:
- Existing paint in good condition
- Cosmetic refresh only
- Same colour recoat
Primer types:
Metal roofs:
- Resene Galvo-Prime (standard)
- Resene Rustmaster (rust areas)
- Dulux Metalshield (heavy-duty)
Tile roofs:
- Resene Concrete Primer (seals porosity)
- Required before membrane coatings
Application:
- Spray for large areas
- Brush for details and spot priming
- Ensure complete coverage
- 24-hour minimum cure
Coverage: 8-10m² per litre on metal, 5-6m² on tiles
Step 8: Final Pre-Paint Inspection
Before first topcoat:
- Verify complete drying
- Check all repairs completed
- Ensure primer fully cured
- Clear any debris
- Mask areas not being painted
- Set up safety systems
Weather check:
- Temperature: 10-30°C
- Humidity: Below 85%
- No rain forecast 24+ hours
- Wind below 30 km/h (spray control)
Common Preparation Shortcuts and Their Consequences
| Shortcut | Result | Failure Timeline |
|---|---|---|
| Skip water blasting | Poor adhesion, paint peels | 1-2 years |
| Insufficient drying | Blistering, trapped moisture | 6-18 months |
| Paint over rust | Continued rust spread | 2-3 years |
| No priming on bare metal | Early coating failure | 1-2 years |
| Skip repairs | Leaks continue, damage spreads | Immediate |
| Work in poor weather | Adhesion failure, runs/sags | 6-12 months |
DIY Preparation: Realistic Assessment
What DIY can reasonably do:
- Moss/lichen treatment
- Minor rust brushing
- Surface cleaning (if you have pressure washer)
What requires professional approach:
- High-pressure water blasting (equipment and safety)
- Extensive rust treatment
- Moisture verification
- Structural repairs
- Proper drying assessment
- Weather forecasting and scheduling
Equipment costs for proper DIY prep:
- Professional pressure washer: $500-$800 hire
- Safety equipment: $500-$800
- Rust treatment tools: $150-$300
- Moisture meter: $100-$200
- Total: $1,250-$2,100
Professional prep included in quote: No separate equipment costs, expertise included.

Professional Preparation Timeline
Typical sequence (180m² Wellington roof):
- Day 1: Inspection, moss treatment
- Days 2-10: Wait for die-off
- Day 11: Water blast cleaning
- Days 12-14: Drying period
- Day 15: Rust treatment, repairs
- Day 16: Priming (if required)
- Day 17: Primer cure, final prep
- Day 18+: Paint application
Total prep time: 17 days (mostly waiting)
Active work: 2-3 days
Wellington reality: Weather often extends this by 5-10 days
How to Evaluate Whether Your Roof Needs Painting
Not every roof needs painting immediately. Here's how to assess urgency:
Paint immediately if you see:
- Active rust on metal roofing, particularly at fastener points or valleys
- Paint peeling or flaking over more than 20% of the surface
- Significant moss or lichen covering more than a third of the surface
- Chalking so severe that colour has faded dramatically and water beads no longer form on the surface
- Any evidence of active leaks traced to roof surface failure (not flashing)
Plan within 1-2 years if you see:
- Surface rust at isolated points only
- Early chalking (slight colour fade but water still beads)
- Patchy moss growth concentrated in shaded areas
- Minor paint flaking at edges or cut lines
Monitoring only if:
- Paint film intact and adhering well across entire surface
- Colour still vibrant
- No rust visible
- Minimal biological growth
A professional inspection costs $150-250 and provides a documented assessment of your roof's condition with photography. This is particularly valuable for roofs over 10 years old or if you're purchasing a property and want to understand the maintenance liability.
Frequently Asked Questions
How often should a Wellington roof be painted?
A properly prepared and painted roof in Wellington typically lasts 8-12 years before repainting is needed. Coastal properties or roofs in high-wind-exposure areas may need attention at 6-8 years. Roofs with ongoing minor maintenance (touch-up of rust spots, clearing of gutters and valleys) tend toward the upper end of the range.
Can a roof be painted in Wellington winter?
It's possible but not ideal. The limiting factors are temperature (below 10°C paints cure poorly), humidity (higher in winter), and the increased frequency of rain days. Preparation work — inspection, biocide treatment, minor repairs — can be done in winter to position for a spring paint application when conditions improve.
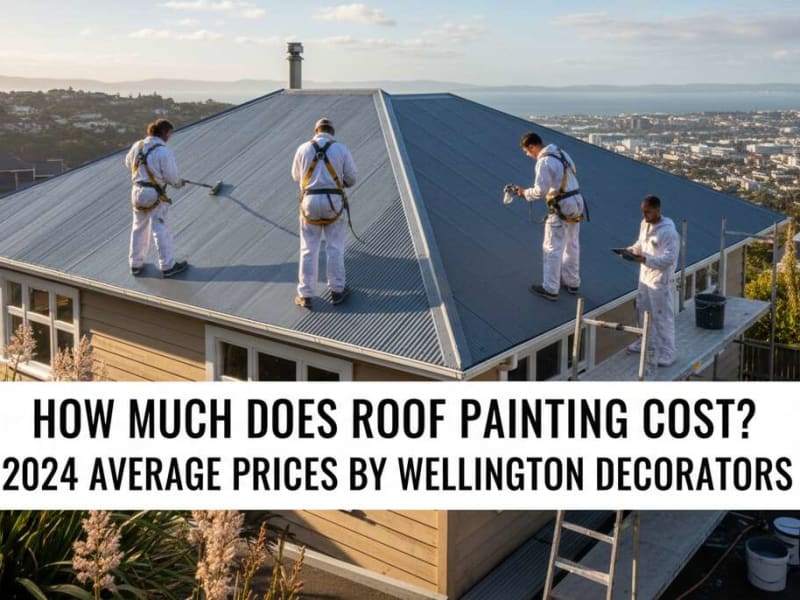
How much does roof painting cost in Wellington?
A complete professional roof paint job (preparation through to two topcoats) on a typical Wellington home runs $3,500-8,000 for a standard metal roof (150-200m²). Tile roofs cost more due to complexity and porosity. Roofs with significant rust treatment or repair work will sit at the upper end or above this range. Always request itemised quotes that separate preparation, repair, priming, and painting costs.
What paint is best for Wellington roofs?
For metal roofs, we specify Resene Roof Paint or Dulux Acratex Roof Membrane — both purpose-formulated products with UV resistance and flexibility for Wellington's temperature cycling. For tile roofs, membrane coatings like Resene Terracotta offer excellent penetration and adhesion on porous substrates. Avoid general-purpose exterior paints on roofs — they lack the flexibility and adhesion characteristics these demanding surfaces require.
Ready to Get Started?
Proper preparation separates 15-year roof painting from 3-year failures. While it takes longer and costs more upfront, thorough prep delivers durability that makes it the best value approach.
Contact Wellington Decorators for professional roof preparation and painting, or learn more about our residential roof painting services. We never skip steps — proper preparation is guaranteed in every project.
Wellington Decorators Limited — Registered Master Painters | Resene Eco Decorator
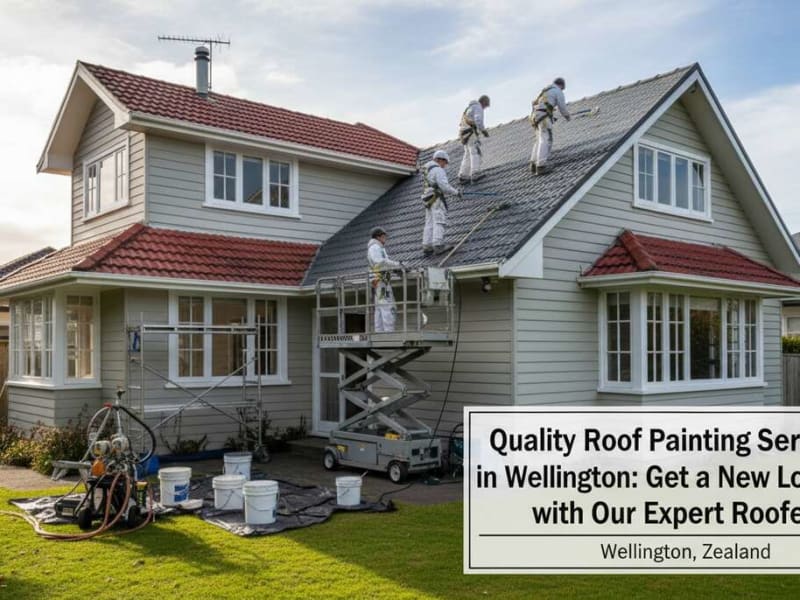
Residential Roof Painting Services
Local Roof Painting Services
Need roof painting in your area? We provide professional roof painting services across Wellington suburbs including Johnsonville roof painting, Churton Park roof painting, Karori roof painting, Kilbirnie roof painting. Get a free quote for your project today.
Related Articles

Need Help With Your Painting Project?
Wellington Decorators has been transforming homes across the Wellington region since 2023, led by a founder with 18+ years in the trade. As Registered Master Painters, we back every job with a 5-year workmanship guarantee.
Prefer to talk? Call us now 027 458 6465